
How member PINs work #
Member PINs add a verification step during event check-in. When the PIN permission is enabled for a staff user, that user will be prompted to enter the member's PIN whenever they attempt to check a member into an event. The PIN is set by staff on behalf of the member and should ideally be chosen by the member themselves.
Required permission #
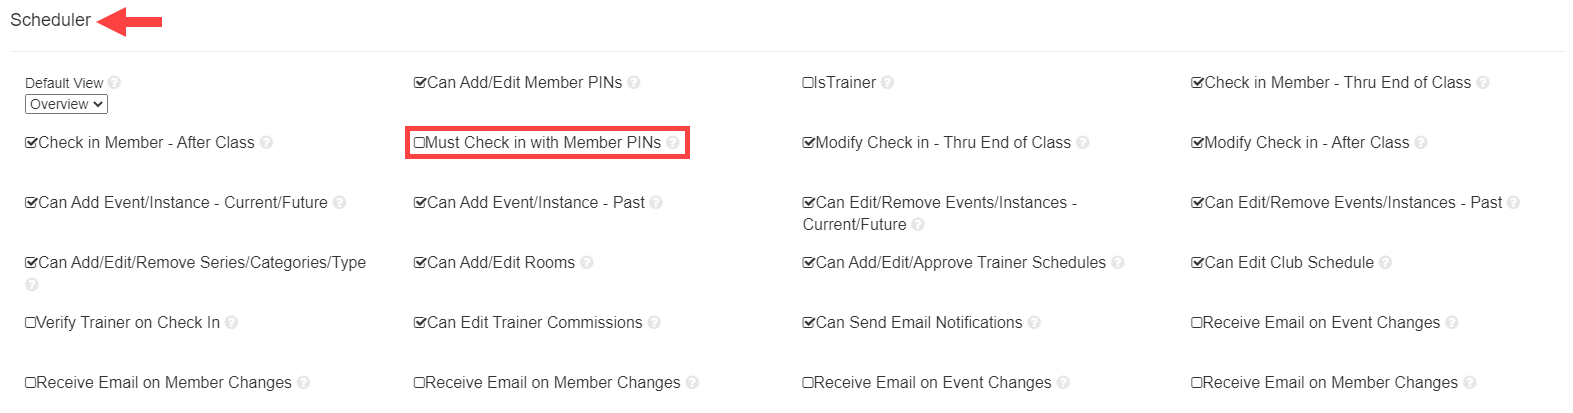
PINs are only enforced for users who have the Must Check in with User PINs permission enabled. This permission is configured in User Management under the Scheduler settings section. Users without this permission can check members in without a PIN prompt.
Setting a member's PIN #
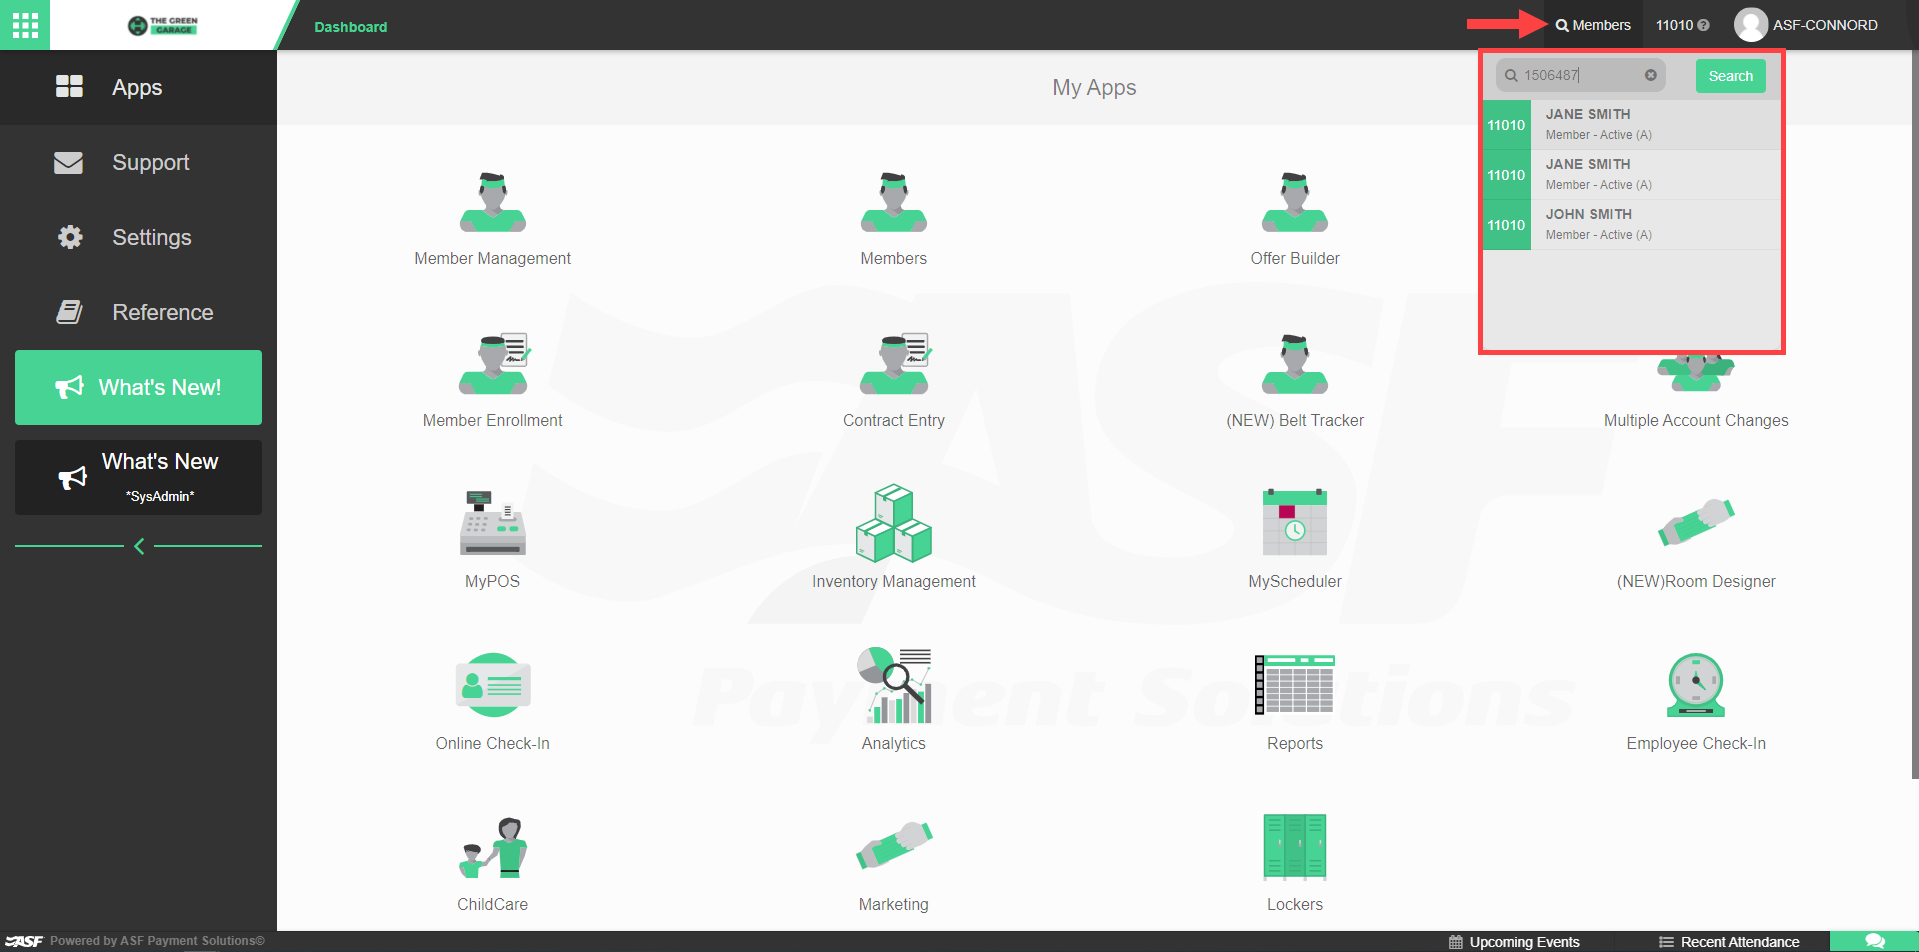
- Locate the member using Quick Member Search.
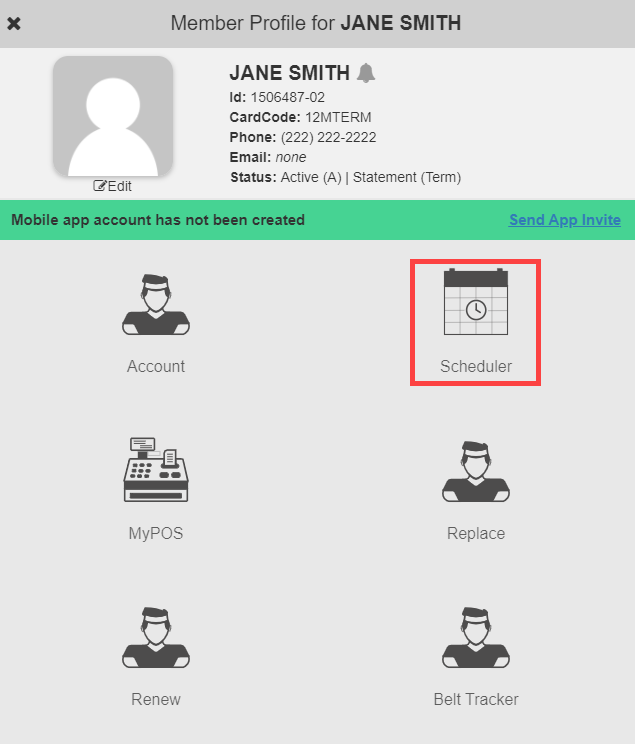
- Navigate to the Scheduler section of their member record.
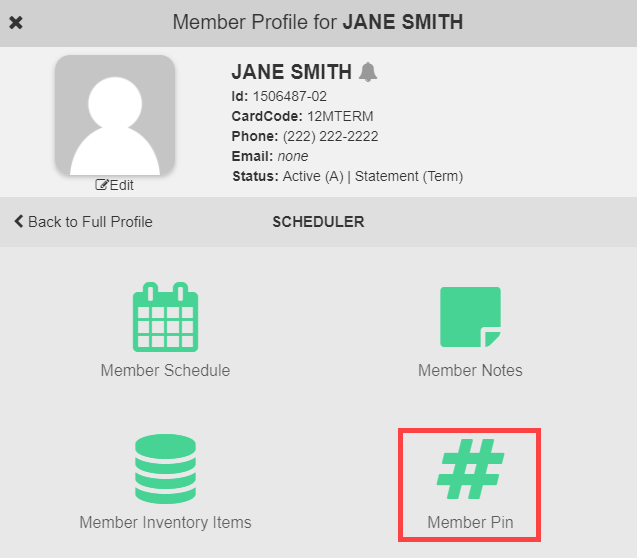
- Select the Member PIN option.
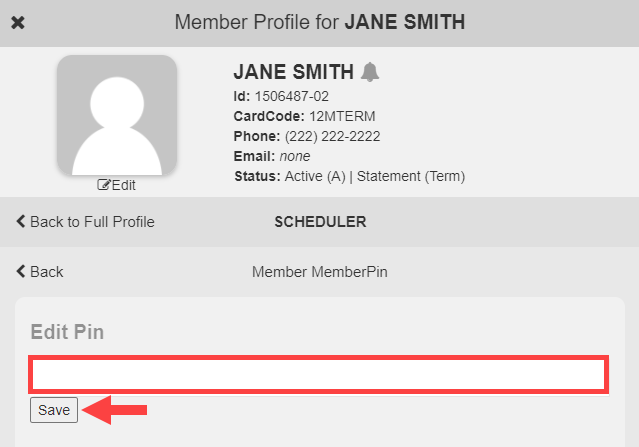
- Enter the desired PIN code in the Add PIN field.
- Save the entry.
Changing an existing PIN #
To update a PIN that has already been set, follow the same steps as above but use the Edit PIN field instead of Add PIN. The old PIN is replaced when you save.
How PINs are used at check-in #
When a staff user with the PIN permission enabled attempts to check a member in, selecting the check mark icon triggers a PIN prompt. The member enters their PIN to confirm their identity before the check-in is recorded.
This applies in two scenarios:
- Staff-assisted check-in: staff selects the check mark in the Check-in view or Online Check-In on the member's behalf.
- Self check-in: the member selects their own scheduled event and enters their PIN to confirm attendance.
Where to go next #
- For the full check-in workflow, see Check-in view.
Need help? #
Contact your ASF account manager at clientsupport@asfpaymentsolutions.com.