
Adding a new item #
Before adding items, confirm that the appropriate item type exists. If not, create it first in Inventory Setup under Item Type.
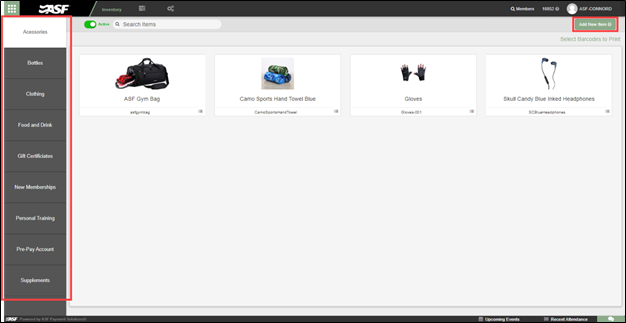
- Navigate to Inventory Management and select the correct Item Type tab from the left sidebar.
- Click Add New Item in the upper-right area.
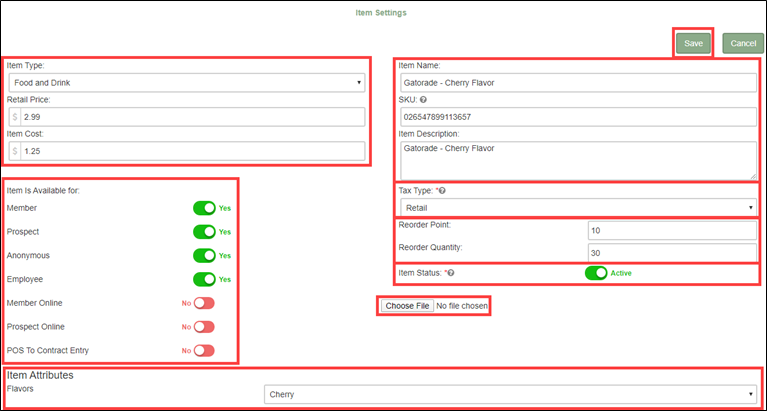
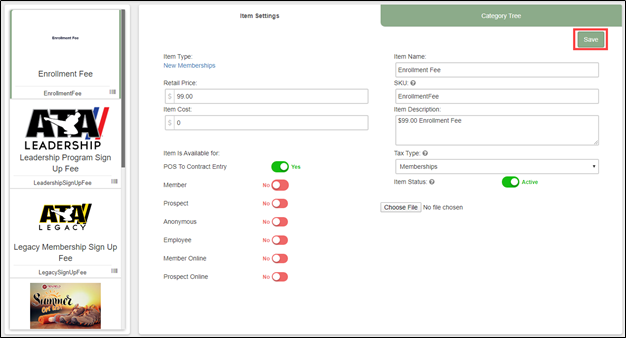
- Complete the Item Settings form (see fields below).
- Click Save.
Item Settings fields #
Fill in the following fields when creating or editing an item:
- Item Type: The category the item belongs to. Can be changed via the dropdown.
- Retail Price: The price customers pay at the point of sale.
- Item Cost: Your cost from the vendor (optional; set to 0 if unused).
- Item is Available For: Controls who can purchase the item. Options include Member, Prospect, Anonymous, Employee, Member Online, and POS to Contract Entry.
- Item Name: A custom label for the item.
- SKU: Must exactly match the number on the item's barcode.
- Item Description: Optional descriptive text.
- Tax Type: Assign a tax classification if applicable.
- Reorder Point and Quantity: Optional thresholds that trigger restocking alerts.
- Item Status: Active or Inactive.
- Choose File: Upload an optional item image.
- Item Attributes: Category-specific properties (such as size or color) assigned at the item type level.

Special item configurations #
Scheduler Bucket items (personal training sessions, class passes) require two additional fields:
- Session Bucket Quantity: Number of sessions added to the member's account per purchase.
- Days to Expire: How long before purchased sessions expire.
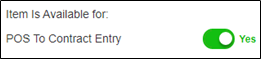
Enrollment Fees should typically have only the POS to Contract Entry toggle enabled, unless you sell them through additional channels.
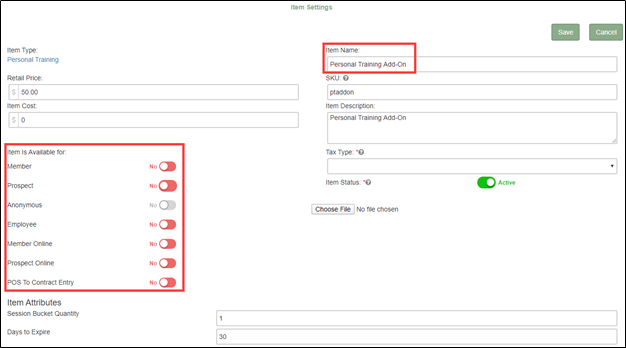
Add-Ons should generally have no availability toggles enabled and should include "Add-on" in the item name to make them easy to identify.
Editing an existing item #
To modify an item, navigate to its item type tab, use the search bar if needed, and click the item icon in the list to open edit mode.
- On the Item Settings tab, adjust retail price, availability, name, and other configuration.
- On the Category Tree tab, assign or remove category associations by clicking categories directly.
Making inventory adjustments #
Use the Inventory Adjustments tab to correct a count that is wrong due to a data error or physical miscount. Enter the correct quantity (this overwrites the current count) and add an explanatory note before saving.
Where to go next #
- To organize items into browsable groups, see Categories and item types.
- To print barcodes for items without them, see Printing barcodes.
- To set up tax assignments, see Tax settings.
Need help? #
Contact your ASF account manager at clientsupport@asfpaymentsolutions.com.