
Before you start #
You must have at least one cash drawer open before processing a transaction. If no drawer is open, open one from the Cash Drawer Maintenance screen first. See Cash drawer operations for instructions.
Step 1: Select a customer #
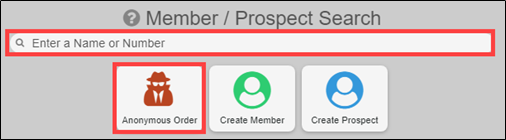
On the MyPOS main screen, identify the customer type:
- Member: Search by name or account number and select the member.
- Prospect: Search for the prospect record.
- Anonymous (walk-in): Use the anonymous or non-member option to process without a customer account on file.
After selecting the customer, choose your cash drawer and, if required by your permissions, designate a salesperson.
Step 2: Add items #
Add items to the order using any of these methods:
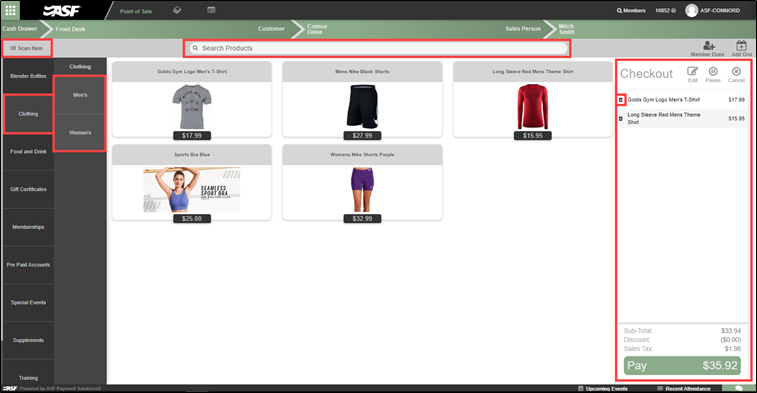
- Browse categories in the left sidebar and tap an item.
- Search by item name or SKU using the search bar.
- Scan a barcode with a compatible scanner.
Selected items appear in the checkout list on the right. To remove an item, click the trash icon next to it.

Editing item prices #
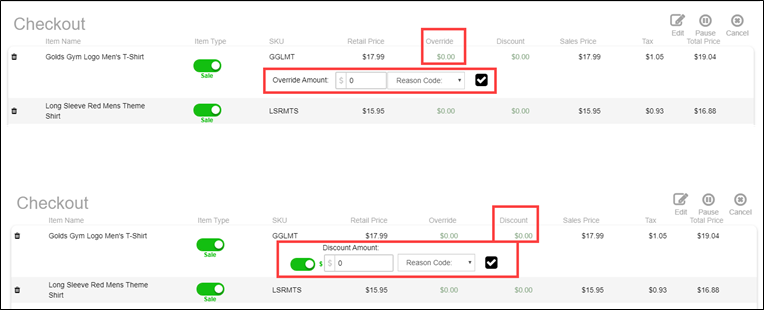
To adjust the price of an item before payment, click Edit in the checkout area. Enter a dollar or percentage discount, select a reason code, and confirm with the checkmark. Close the Edit screen by clicking Edit again.

Paying member dues and add-ons #
For member accounts, dedicated Dues and Add-ons buttons appear in the upper-right area. Selecting either displays upcoming, past-due, and late-fee amounts. Future add-on payments can be processed if that feature is enabled in Client Preferences.
Pausing an order #
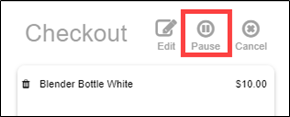
If a customer needs to step away or you need to assist another customer, click Pause to save the current order to Incomplete Orders. You can resume it later from the same screen without losing any items already added.
Cancelling an order #
To discard an in-progress order entirely, click Cancel and confirm. Cancelled orders cannot be recovered.
Step 3: Process payment #
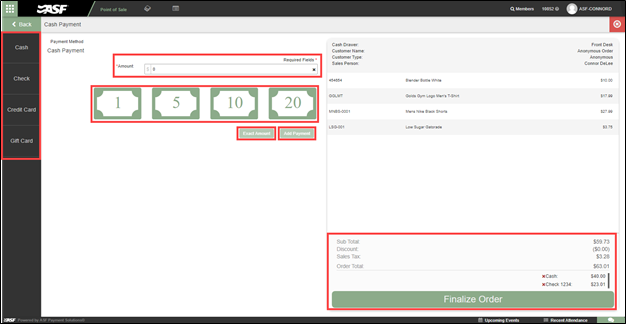
When the order is ready, click Pay at the bottom of the checkout list.
- Select the payment method: cash, card, ACH, or an on-file method.
- Enter the payment amount. You can split across multiple payment methods by adding more payment lines.
- To reverse a payment line before finalizing, click the red X icon next to it.
- Click Process Payment to complete the transaction.
Step 4: Issue a receipt #
After processing, select how to deliver the receipt:
- Email: Sends a receipt to the customer's email on file.
- Print: Sends the receipt to the connected printer.
- Gift: Prints a gift receipt.
Click New Order to return to the main MyPOS screen and begin the next transaction.
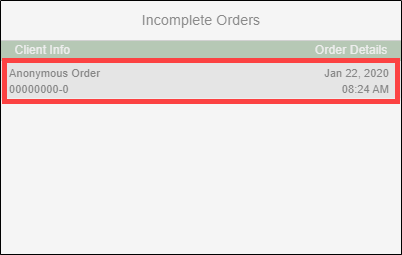
Running a transaction for a non-member or walk-in #
If the customer does not have a member account, use the anonymous or walk-in selection on the customer search screen. The transaction flow is identical to a member transaction. Item selection, payment, and receipt steps all work the same way.
Where to go next #
- To apply discounts during a transaction, see Discounts and overrides.
- To reverse a completed transaction, see Returns and voids.
- For cash drawer setup, see Cash drawer operations.
Need help? #
Contact your ASF account manager at clientsupport@asfpaymentsolutions.com.